![]()
![]()
![]()
![]()
![]()
![]()
![]()
![]()
![]()
![]()
![]()
Pack #6800
Slideshow #2
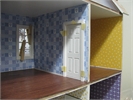
Interior Doors
...after wallpaper and flooring

DHTMLGoodies.com
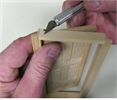
 Tape the pins somewhere safe so they won't get lost
DividerExtension/InteriorDoor13_lg.jpg
Tape the pins somewhere safe so they won't get lost
DividerExtension/InteriorDoor13_lg.jpg
Tape the pins somewhere safe so they won't get lost
DividerExtension/InteriorDoor13_lg.jpg
DHTMLGoodies.com
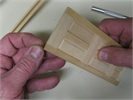
 Glue together the Back Frames - flat and square
DividerExtension/InteriorDoor13b_lg.jpg
Glue together the Back Frames - flat and square
DividerExtension/InteriorDoor13b_lg.jpg
Glue together the Back Frames - flat and square
DividerExtension/InteriorDoor13b_lg.jpg
DHTMLGoodies.com
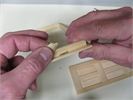
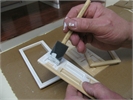
 Clean and finish with a 3/16 flat artist's brush
DividerExtension/InteriorDoor17_lg.jpg
Clean and finish with a 3/16 flat artist's brush
DividerExtension/InteriorDoor17_lg.jpg
Clean and finish with a 3/16 flat artist's brush
DividerExtension/InteriorDoor17_lg.jpg
DHTMLGoodies.com
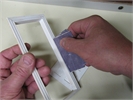
 The paint is dry - clean the pin hole with a needle or wire
DividerExtension/InteriorDoor18_lg.jpg
The paint is dry - clean the pin hole with a needle or wire
DividerExtension/InteriorDoor18_lg.jpg
The paint is dry - clean the pin hole with a needle or wire
DividerExtension/InteriorDoor18_lg.jpg

DHTMLGoodies.com
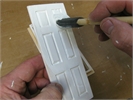
 "Find" the hole in the bottom of the door and push in the pin
DividerExtension/InteriorDoor19d_lg.jpg
"Find" the hole in the bottom of the door and push in the pin
DividerExtension/InteriorDoor19d_lg.jpg
"Find" the hole in the bottom of the door and push in the pin
DividerExtension/InteriorDoor19d_lg.jpg


DHTMLGoodies.com
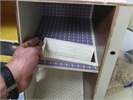
 Let the glue dry, then turn the house upright
DividerExtension/InteriorDoor25_lg.jpg
Let the glue dry, then turn the house upright
DividerExtension/InteriorDoor25_lg.jpg
Let the glue dry, then turn the house upright
DividerExtension/InteriorDoor25_lg.jpg
DHTMLGoodies.com
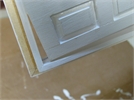
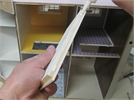
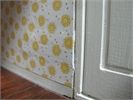
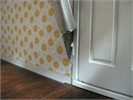 If you have wiring to work around, tuck the wallpaper into the space
DividerExtension/InteriorDoor26_lg.jpg
If you have wiring to work around, tuck the wallpaper into the space
DividerExtension/InteriorDoor26_lg.jpg
If you have wiring to work around, tuck the wallpaper into the space
DividerExtension/InteriorDoor26_lg.jpg
DHTMLGoodies.com
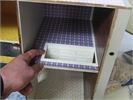
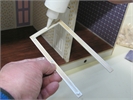
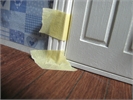
 Prepare flaps of tape for taping on the Back Frames
DividerExtension/InteriorDoor28_lg.jpg
Prepare flaps of tape for taping on the Back Frames
DividerExtension/InteriorDoor28_lg.jpg
Prepare flaps of tape for taping on the Back Frames
DividerExtension/InteriorDoor28_lg.jpg


DHTMLGoodies.com
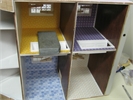
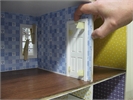
 The back frame is most visible and easiest to clamp
DividerExtension/InteriorDoor36_lg.jpg
The back frame is most visible and easiest to clamp
DividerExtension/InteriorDoor36_lg.jpg
The back frame is most visible and easiest to clamp
DividerExtension/InteriorDoor36_lg.jpg
DHTMLGoodies.com
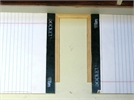
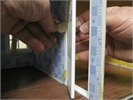
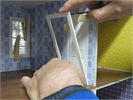
 You can position the side frames by taping to the floor
DividerExtension/InteriorDoor37_lg.jpg
You can position the side frames by taping to the floor
DividerExtension/InteriorDoor37_lg.jpg
You can position the side frames by taping to the floor
DividerExtension/InteriorDoor37_lg.jpg

